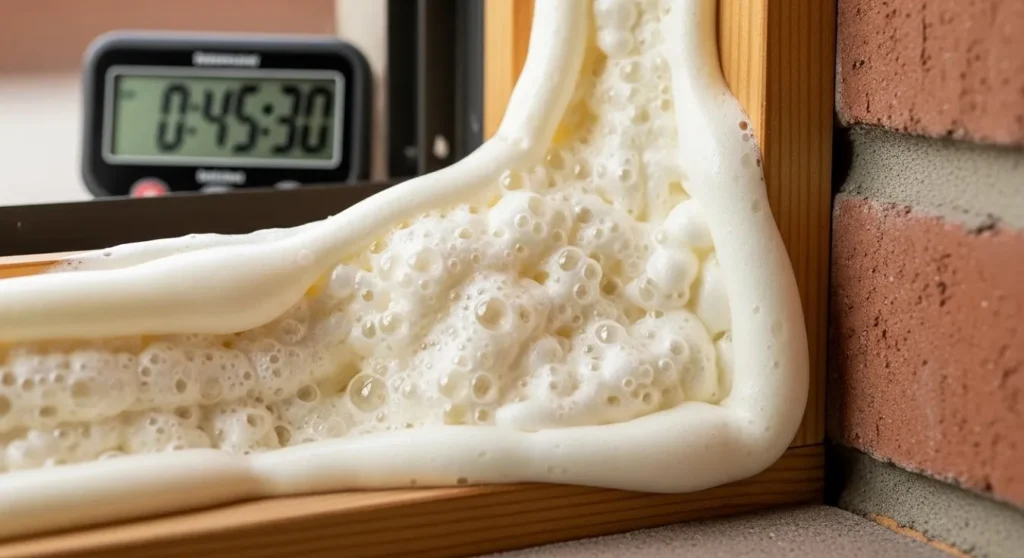
Most DIY enthusiasts treat a can of polyurethane like a simple gap filler that should behave like instant whipped cream. I have seen this costly mistake lead to sticky residues on expensive carpets and a literal breeding ground for messy overflows that eventually distort door frames. At ClearFoam Roof & Insulation we have learned that learning how long does expanding foam take to dry is not just about watching the clock but about managing the atmospheric moisture that triggers the chemical reaction.
If you are looking for a permanent thermal barrier you must recognize that the initial skin is only the start of the hardening process. The real transformation happens deep inside the bead where the closed cell structure remains active and can even expand further through hydrophilic reactions that ruin your alignment. This creates an aesthetic disaster and a pocket of soft chemicals that can invite drafts into your warm living space.
Why Surface Hardness Is Often a Homeowner Fantasy
Many people assume that once the exterior feels tack free, they can start carving and painting immediately. In my experience this is the most common blunder in home insulation because the core of the foam requires a steady supply of humidity to fully solidify. When you investigate how long does expanding foam take to dry through the lens of a quick fix you are essentially forcing the material to collapse before the internal gas bubbles have a chance to stabilize.
The most effective strategy involves pre-misting the area to ensure the product has enough water to finish its work. At ClearFoam Roof & Insulation we recommend a realistic window of twenty-four hours for a full structural cure to allow for complete polyurethane cross-linking. If you ignore this step you will end up with a stubborn hollow center that refuses to stay rigid even after several days of waiting.
Practical Stages of a Professional Foam Set
The Initial Tack Free Surface Phase
If the room is warm you can often win the fight by seeing the surface skin over in under ten minutes. You must resist the urge to touch it immediately to stop the sky from collapsing the foam beads before the internal structure is strong enough to support the weight.
The Working and Trimming Process
For larger challenges where you have overfilled a cavity a sharp serrated blade is the undisputed king of durability. This method is the favorite at ClearFoam Roof & Insulation because it provides a massive amount of precision while leaving a clear path for vapour barriers to be applied over the top.
The Full Structural Load Bearing Cure
You can use mechanical fixings to manage the final shape while keeping the temperature of the room perfectly stable. This method is highly effective but requires a timeframe of at least twelve hours to ensure the adhesion and expansion pressures are perfectly balanced and finished.
Avoiding Door and Window Frame Bowing
Gaps in the understanding of expansion force are a traditional mistake that works poorly if the frame is not braced. You must use professional ClearFoam Roof & Insulation techniques and follow recognised building standards from the NHBC to ensure the timber stays straight before the final foam is locked into position.
Why Experts Focus on Humidity Over Temperature
When you evaluate how long does expanding foam take to dry the primary factor should always be the moisture content of the air. If you plan to seal a dry attic or a dusty brick wall you cannot afford to have a weak bond shifting the seal of your new insulation. A professional application removes the risk of shrinkage and leaves behind a durable shield that actually improves your R-value and energy savings over time.
I have witnessed homeowners spend hours cleaning up drips only to realize they lack the acetone to move the dried foam from their hands. Choosing a professional path with ClearFoam Roof & Insulation saves your skin and ensures the ugly yellowing is solved before the next time you decide to decorate. It is the only way to guarantee a level seal that looks like the gap was never there in the first place.
Mandatory Kit for a Successful Foam Project
If you decide to take on a DIY project you will need a specific kit to ensure success. Proper preparation is the difference between a successful afternoon and a devastating week of trying to scrub sticky resins off your hardwood floors.
- A professional grade applicator gun for achieving a consistent flow rate without sputtering.
- A clean spray bottle for misting the substrate and prying out maximum expansion from every gram of product.
- Nitrile gloves and eye protection to guard against high pressure bursts and messy overflows.
- High quality gun cleaner or solvent to initiate the cleaning process before the foam hardens inside the tool.
At ClearFoam Roof & Insulation we always suggest clearing a three foot radius around the work area to avoid hitting hidden ornaments or soft furnishings. Once the area is prepared you can accurately judge if you have the right tools for the job or if you need to call in a specialist. This is often the most efficient way to manage how long does expanding foam take to dry without wasting your hard earned money on extra cans.
How to Stop Bubbling and Pressure from Ruining Your Finish
Identifying the Risks of Over-Filling Cavities
The volume to space ratio is often the hardest part to master but it must be precise to stop all future bulging.
Managing Internal Air Quality Levels
Some brands have high VOC counts which can damage nearby indoor plants.
Working in Extremely Dry Conditions
Trying to spray foam in a desert dry room is a recipe for disaster because the lack of moisture makes it nearly impossible to set.
Smart Disposal of Used Foam Cans
You will likely end up with more waste than you expect so plan for a hazardous waste bin nearby.
Preserving the Thermal Health of Your Home
Expanding foam is not just a cosmetic filler because it introduces a tighter seal into your building fabric in ways that can be detrimental to the airflow if mismanaged. As the old drafty gaps are closed it can pull condensation out of the living space which leads to damp patches on the rafters and weakened timber. I have seen beautiful homes ruined because a fresh seal was allowed to be installed without any thought for the cross ventilation.
By focusing on how long does expanding foam take to dry now you are protecting the long term value of your entire property. At ClearFoam Roof & Insulation we believe in proactive maintenance that removes draft risks before they can jump to your heating bills or expensive energy costs. For more complex issues, working with professional Spray Foam Removal Specialists ensures any failed or incorrectly installed insulation is handled safely and effectively.
Frequently Asked Questions
What Is the Fastest Way to Make Expanding Foam Dry?
If the air is dry then a light mist of water from a spray bottle is your only choice. However, it is not an instant fix. I tell my clients to ensure the area is damp but not soaking. It still takes time for the core to harden but it is better than a soft center that ruins your seal.
Will The Foam Keep Expanding After It Is Tack Free?
Yes, especially with high expansion formulas that love to push against the boundaries for hours. If you do not tackle the volume issue you will be trimming off excess waste for the next two days. This is why learning how long does expanding foam take to dry is so vital for a clean finish.
Is It Safe to Use a Hair Dryer to Speed Up the Set?
It is dangerous because heat can cause the gas inside the bubbles to expand too quickly and pop the structure. I have seen seals crack and fail within a single hour. If you do use any heat you need to monitor the surface constantly and ensure the air stays moving but not hot.
Can I Just Paint Over the Foam Once It Feels Firm?
I strongly advise against this because the foam will eventually shift as it reaches its full cure and split the paint. You will end up with a visible scar on your window trim. Plus, the moisture trapped under the paint will pull the adhesion right off the surface.
Why Do Professional Installers Prefer Gun Applied Foam Over Straw Cans?
Using a straw can to fill a gap in one go can cause massive collateral damage to your trim and paintwork. Guns are surgical. At ClearFoam Roof & Insulation we can achieve a perfect bead without disturbing the delicate wallpaper just an inch away.